


How to set up eSIM on iPhone
By Ultra Team
Published January 14, 2026
You’ve probably heard the word eSIM before, but what does it mean? A SIM, short for Subscriber Identity Module, is a unique identifier inside every phone that stores a user’s account information. These used to only come as physical plastic cards called a physical SIM. But nowadays with new technology, they’re embedded inside your phone, which is why they’re called eSIM—the “e” stands for embedded. An eSIM can only be modified digitally, but they connect you to your network the same way a physical SIM would, but are faster and able to be set up on your own.
While installing and setting up an eSIM yourself on your iPhone might seem a little intimidating, it doesn’t have to be. Setup can only take a few minutes with the right steps, so let’s dive in.
How do I know if my iPhone is eSIM compatible?
That would depend on how new your iPhone model is. For example…
- iPhone XS, XS Max, XR and newer models support eSIM
- iPhone 14 and newer U.S. models are eSIM-only, with no physical SIM tray
- Older models (iPhone X and earlier) do not support eSIM
How to check your iPhone model
Not sure which iPhone model you own? Here’s how to check:
- Go to Settings → General → About
- Look for the Model Name (e.g., iPhone 13, iPhone 15 Pro)
How to check your iOS version
Want to know what iOS version you have? Here’s how:
- Go to Settings → General → About
- Look for iOS Version
- Make sure your iPhone is updated to the latest iOS for best eSIM performance
How to add eSIM to iPhone
Now that you know what an eSIM is and why phone manufacturers have adopted the technology, here’s how to add eSIM for iPhone. There are a few different methods.
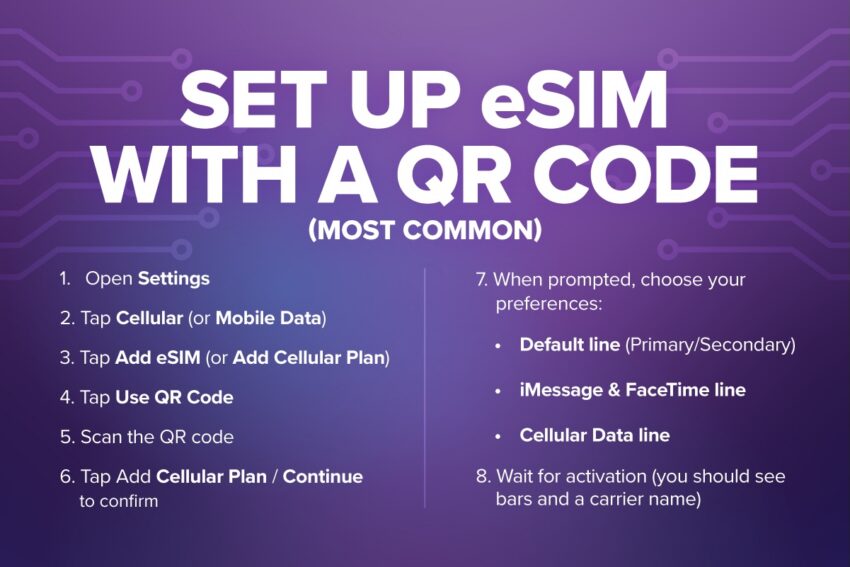
Set up eSIM with a QR code (most common)
- Open Settings
- Tap Cellular (or Mobile Data)
- Tap Add eSIM (or Add Cellular Plan)
- Tap Use QR Code
- Scan the QR code
- Tap Add Cellular Plan / Continue to confirm
- When prompted, choose your preferences:
- Default line (Primary/Secondary)
- iMessage & FaceTime line
- Cellular Data line
- Wait for activation (you should see bars and a carrier name)

Set up eSIM manually (if QR won’t scan)
- Open Settings → Cellular → Add eSIM
- Tap Use QR Code
- Tap Enter Details Manually
- Enter the SM-DP+ Address and Activation Code (and confirmation code if provided)
- Tap Next and follow prompts to finish activation
Labeling and managing your eSIM
Maybe you have multiple eSIMs and want to label one for work and one for home, or have one be your default for calls and the other for texts. Whatever the reason, here’s how to organize and label your eSIMs.
How to name your eSIM
- Go to Settings > Cellular
- Tap the eSIM you want to rename
- Select Cellular Plan Label, and choose a name or enter a custom one (e.g. Work, Home, School, Trip)
Choosing default lines for calls, texts and data
To set up a default voice line:
- Go to Settings and select Cellular
- Tap Default Voice Line
- Choose between your two active lines (e.g., “Personal” or “Work”)
To set up a default text eSIM:
- Go to Settings > Network & Internet (or Cellular) > Calls & SMS (or Mobile Data)
- Select your eSIM
To set up an eSIM as the default for data:
- Go to Settings > Cellular/Mobile Data
- Tap on Cellular Data
- Select your eSIM from the list
Switching between lines if dual SIM is enabled
If you have dual SIM enabled, here’s how to switch between lines while making a call or texting.
- Open the Phone app or start a new message
- Look for the eSIM name at the top of the screen
- Tap the eSIM label to select another line you want to use
How to remove eSIM on iPhone
Need to remove an eSIM? Here’s how:
- Open Settings
- Tap Cellular (or Mobile Data)
- Select the eSIM/cellular plan you want to remove
- Tap Remove Cellular Plan
- Confirm by tapping Remove again
But remember: removing an eSIM does not cancel your service, it only deletes the plan from your iPhone. You’ll need a new QR code or activation details to add the eSIM back.
Now you see how SIMple eSIM is!
We hope our guide has shown you how setting up eSIMs for iPhone is quick and convenient and how eSIM as a technology allows for seamless connectivity. Want to try out eSIM for yourself? Tap the button below to check your eSIM compatibility.


